Why Your Mini-Split is Dripping Water Inside: A Bellevue Repair Case Study
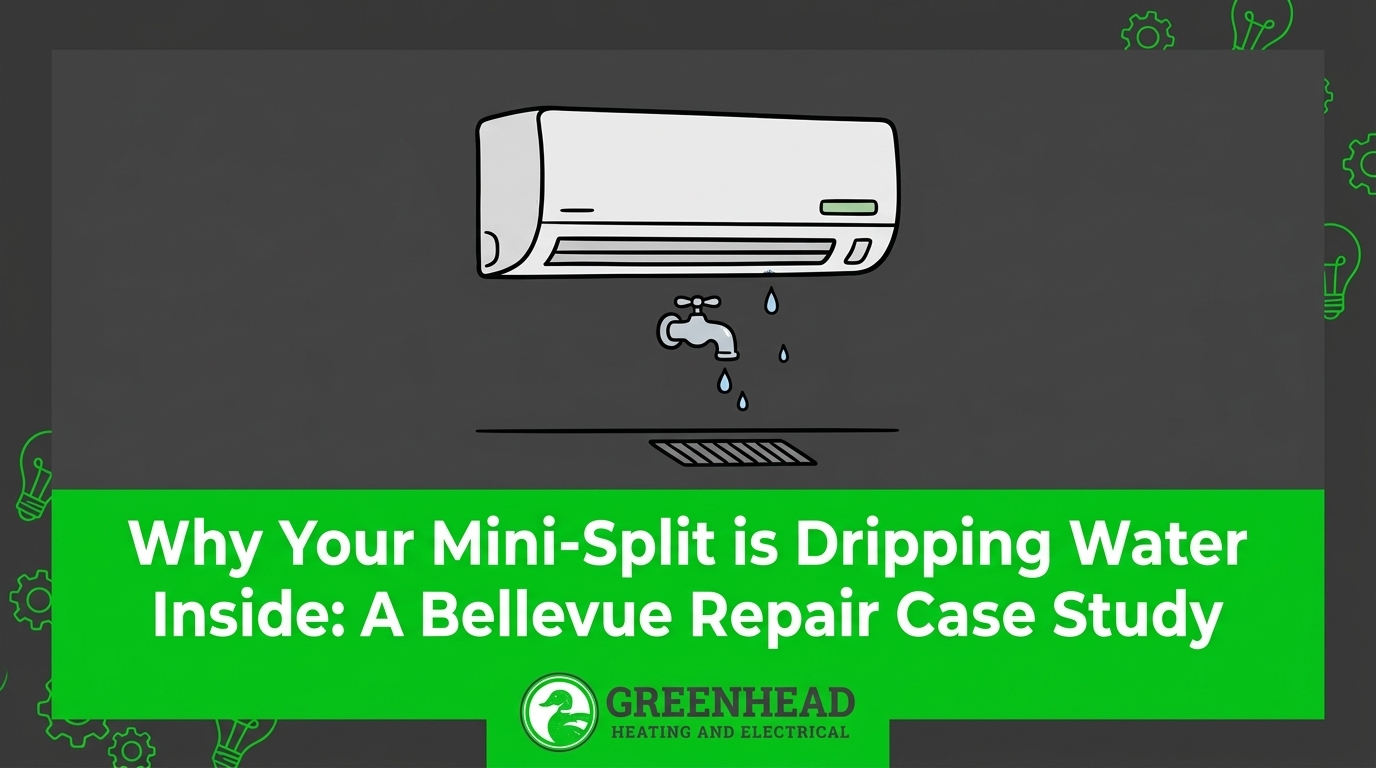
The Immediate Threat: Water Dripping Down Your Interior Wall
A dark water stain spreading across your drywall or a steady drip pooling on your floor is a fast way to ruin an otherwise comfortable afternoon. If you are researching why your mini-split is dripping water inside: a Bellevue repair case study, our team at Greenhead Heating & Electrical LLC knows you are likely dealing with an active leak right now. Discovering water escaping from your ductless indoor air handler is stressful, primarily because the moisture is in direct contact with your home's interior finishes. Drywall acts like a sponge, and what starts as a minor drip can quickly escalate into bubbling paint, warped baseboards, and compromised flooring.
While an indoor water leak is alarming, a pattern we see often is that it is a surprisingly common mechanical issue that surfaces during seasonal transitions. When a ductless system begins dripping inside the home, you are facing an immediate decision point: you must stop the flow of water before addressing the root cause. Protecting your property always comes first. If you are dealing with this issue, understanding how mini-split systems operate will help you navigate the repair process and prevent future water damage to your home.
Step One: Shut Off the Mini-Split Immediately
Before you start looking for a flashlight or trying to diagnose the source of the drip, your immediate priority is stopping the production of condensation. A running ductless unit will continue to pull moisture from the air, funneling more water into an already overflowing system. Mitigating property damage requires swift action.
Follow these steps to secure the unit:
1. Power down via the remote: Point your remote at the indoor air handler and press the power button to stop the fan and the compressor. Listen for the unit's louvers to close.
2. Flip the breaker: Because water and electricity are a dangerous combination, do not rely on the remote alone. Locate your home's main electrical panel and switch off the dedicated breaker for your ductless system. This eliminates the risk of an electrical short if water has reached the unit's control board.
3. Protect the floor and walls: Lay down thick towels or place a bucket directly beneath the leak. If water is trailing down the wall, gently wipe away the surface moisture to prevent it from soaking further into the baseboards.
The risks of ignoring a minor drip:
It can be tempting to place a towel on the floor and let the unit keep running, especially if you are relying on the system during the fall heating-startup. However, a continuous leak will quickly saturate the drywall behind the unit. Prolonged moisture exposure leads to structural degradation and creates an environment prime for mold growth inside the wall cavity. Furthermore, water spilling over the internal drain pan can short out the sensitive electronic sensors housed inside the air handler.
A strict warning against DIY teardowns:
We always tell our Puyallup and Bellevue customers: once the power is off, leave the unit intact. Do not attempt to remove the plastic casing, unscrew the electrical panel, or detach the indoor unit from its wall bracket. Ductless systems are highly engineered pieces of equipment with tightly packed components. Disassembling the unit without proper training often leads to cracked drain pans, snapped sensor wires, or exposure to high-voltage components. Diagnosing and resolving the internal mechanics requires licensed AC and mini-split repair in Bellevue.
The Primary Culprit: A Clogged Condensate Drain Line
When an indoor ductless unit leaks water down the wall, the most frequent cause is a blockage inside the condensate drain line. To understand why this happens, it helps to understand how the system manages moisture under normal operating conditions.
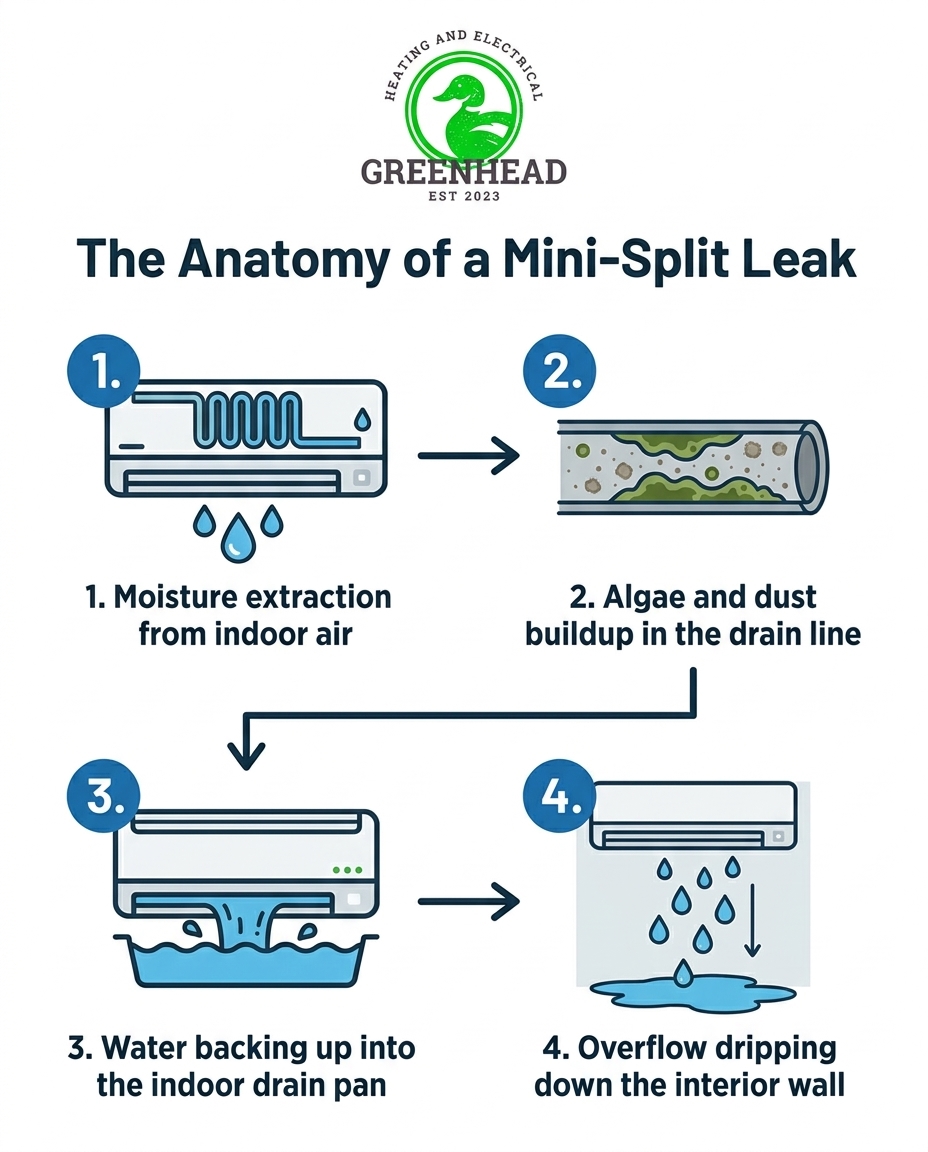
As your heat pump operates in cooling or dehumidification mode, the indoor evaporator coil gets very cold. Warm room air is pulled over this chilled coil, causing the ambient humidity to condense into liquid water—much like beads of sweat forming on a cold glass of iced tea. This water drips off the coil and collects in a shallow plastic trough called the condensate drain pan, located just beneath the coil assembly. From there, gravity feeds the water into a narrow PVC or flexible plastic tube (the condensate drain line), which carries the moisture safely through the wall and deposits it outside your home.
The problem arises when this narrow drainage pathway becomes restricted. In our years of servicing HVAC systems throughout the region, we see firsthand how the Pacific Northwest's moderate but highly humid climate causes ductless heat pumps to extract heavy amounts of moisture from the indoor air. This constant flow of water creates a dark, perpetually damp environment inside the drain tube. Over time, airborne dust that slips past the air filters mixes with this moisture to form a thick sludge. More importantly, the damp conditions are a prime breeding ground for biological growth, specifically algae and mold.
As algae blooms and dust accumulates, the interior diameter of the drain line slowly narrows. Eventually, a solid blockage forms. Because the system is still extracting moisture from the air, the water has nowhere to go. It backs up the tube, fills the shallow drain pan to the brim, and ultimately cascades over the edge. Because the unit is mounted flush against the drywall in your Bellevue home, that overflowing water travels down the path of least resistance: straight down your interior wall.
Why Summer Cooling Leads to Fall Startup Leaks
One of the most frustrating aspects of a leaking mini-split is the timing. Homeowners often wonder why a system that ran flawlessly in July suddenly starts dripping water down the wall in October. The answer lies in the seasonal usage patterns and the slow, hidden nature of algae growth.
During the heavy summer cooling season, your ductless system is working overtime. It is actively dehumidifying the home, funneling massive amounts of water through the condensate lines every single day. While this high volume of water keeps the line somewhat flushed, it also deposits microscopic organic matter and dust along the interior walls of the tube. The algae and sludge accumulate incredibly slowly, millimeter by millimeter, throughout the high-usage months.
As summer fades into the mid-fall shoulder season, the system runs less frequently. The water inside the drain line slows to a trickle and often sits stagnant. This stagnant period allows the algae and sludge to dry out slightly, solidify, and bind together, creating a firm plug that completely seals the diameter of the tube.
When the first cold snaps hit and you engage the system for the fall heating-startup, the unit undergoes defrost cycles. Even in heating mode, heat pumps occasionally reverse their flow to melt frost off the outdoor unit, which can generate residual moisture indoors. Furthermore, if you switch the unit back to cooling mode on an unseasonably warm autumn afternoon, the system immediately dumps a heavy load of condensation into the pan. Because the drain line is now firmly plugged by the solidified summer sludge, the water backs up almost instantly. Our technicians at Greenhead Heating & Electrical frequently respond to these exact scenarios every October; the leak appears sudden to the homeowner, but the blockage was actually months in the making.
Other Potential Causes for an Indoor Mini-Split Leak
While a clogged condensate line is the primary suspect in the vast majority of indoor water leaks, it is not the only mechanical failure that can cause water to pool on your floor. Proper diagnostics require ruling out several other potential culprits that mimic the same symptoms.
Secondary causes of indoor water leaks include:
• Severely dirty air filters: When the reusable mesh filters on top of the unit become caked in heavy dust, they choke off the system's airflow. Without enough warm room air blowing over the indoor coil, the refrigerant drops the coil's temperature below freezing. The condensation turns to solid ice. When the unit eventually cycles off, that thick block of ice melts rapidly, overwhelming the capacity of the shallow drain pan and causing a massive overflow.
• A compromised drain pan: Over years of use, the plastic drain pan can degrade. Thermal expansion and contraction can cause hairline cracks to form in the plastic. Alternatively, if the pan has shifted out of alignment due to vibrations, water will bypass the drainage hole entirely and leak into the unit's casing.
• Improper initial installation: Ductless air handlers rely entirely on gravity to drain water. If the wall bracket was not installed perfectly level, the water will pool on the lower side of the pan rather than flowing toward the exit port. This is a common issue with DIY installations or rushed contractor work.
• Refrigerant leaks: Similar to a dirty filter, low refrigerant levels alter the pressure inside the system, causing the indoor coil to freeze over and subsequently melt all over the floor.
Understanding these different failure points highlights why a comprehensive system evaluation is necessary. Just as evaluating existing ductwork before adding a heat pump ensures a central system operates correctly, our team's thorough evaluation of the internal components of a ductless unit ensures it won't damage your Bellevue home.
• Steady drip during cooling/defrost mode — Most Likely Cause: Clogged condensate line — Impact on System: Water backs up into pan and overflows
• Sudden rush of water after unit turns off — Most Likely Cause: Frozen evaporator coil (dirty filter/low refrigerant) — Impact on System: Ice block melts too fast for the drain to handle
• Leaking only from one specific corner — Most Likely Cause: Unlevel installation or cracked pan — Impact on System: Gravity pulls water away from the drain port
Inside a Local Repair: The Professional Diagnostic Process
When a homeowner calls about a leaking ductless unit, resolving the issue requires more than just aiming a wet/dry vacuum at the outdoor pipe. To provide a permanent fix, a technician must systematically identify the root cause, clear the blockage safely, and verify the integrity of the unit's internal components. At Greenhead Heating & Electrical, our transparent diagnostic process demonstrates the hands-on expertise our technicians bring to every call across the Bellevue HVAC service area.
Here is what a professional diagnostic evaluation entails:
1. Visual Inspection and Level Verification
The process begins before the unit is even opened. A technician will use a precision level to ensure the wall bracket hasn't settled or shifted, confirming that gravity is still working in the drain pan's favor. Next, the outer casing is carefully removed to expose the drain pan. The technician inspects the plastic for hairline cracks, rust (on older metal components), and signs of overflow.
2. Testing the Condensate Line Safely
If the pan is intact but full of standing water, the drain line is the confirmed culprit. Professionals do not use high-pressure compressed air from the inside, as this can blow the line apart inside the wall cavity, causing a hidden and catastrophic leak. Instead, specialized, non-damaging diagnostic tools—such as low-suction clearing devices or micro-cameras—are used to locate and extract the biological buildup without stressing the pipe joints.
3. Verifying Airflow and Refrigerant
Once the line is clear and draining properly, the technician will check the reusable filters and inspect the evaporator coil for signs of frost. They will measure the temperature drop across the coil to ensure the refrigerant levels are balanced. If the system is low on refrigerant, it will freeze again, meaning the leak will return regardless of how clean the drain line is.
4. Safe Biological Treatment
Finally, the technician will flush the pan and the line with a specialized, system-safe solution. This neutralizes the remaining algae spores and breaks down residual sludge without corroding the plastic components or off-gassing harsh chemicals into your living space. This step is critical for preventing the clog from reforming a few weeks later.
How to Prevent Future Condensate Line Clogs
Once your system has been repaired and your walls are dry, the focus shifts to prevention. Ductless systems are incredibly efficient and reliable, but they demand consistent upkeep to manage the moisture they extract from your home. Taking a proactive approach will help you avoid another unexpected water event.
Follow this preventative checklist to keep your system draining properly:
• Clean reusable air filters regularly: This is the single most important task a homeowner can perform. Pop the front cover open and wash the mesh filters every two to four weeks. Preventing dust from entering the unit stops that dust from mixing with moisture to create sludge in the drain line. It also ensures proper airflow, preventing the coils from freezing.
• Keep the outdoor unit clear: Ensure the outdoor compressor is free of yard waste. Clear away fall leaves, overgrown shrubs, and debris. While this doesn't directly affect the indoor drain line, it ensures the system operates at the correct pressures, reducing the risk of freezing coils.
• Monitor the outdoor drain pipe: Periodically check the PVC pipe that exits your home near the outdoor compressor. During humid weather, you should see a steady drip of water. If the pipe is bone dry while the indoor unit is running in cooling mode, a clog is likely forming.
• Schedule professional maintenance: The most effective way to prevent fall heating-startup leaks is to schedule routine mini-split maintenance. We highly recommend a pre-winter inspection so a professional can perform a thorough flushing of the condensate lines, neutralizing algae before it has a chance to solidify into a blockage.
Frequently Asked Questions About Leaking Mini-Splits
Why is my mini split leaking water inside?
The most common reason is a clogged condensate drain line. Dirt, dust, and algae block the tube, causing water to back up and overflow the drain pan. Because the unit extracts heavy moisture from the air during operation, that water has nowhere to go but down your interior wall. Other causes can include dirty filters that freeze the coil, or a cracked internal drain pan.
Is it safe to run a mini split if it's leaking water?
No, it is not safe for your home. Continuing to run the unit will pump more water into the overflow, risking severe damage to drywall, paint, and flooring. Furthermore, water spilling inside the casing can reach the electrical control board, potentially causing a short circuit or permanent damage to the system's sensors. You should shut the unit off at the breaker immediately.
Can a dirty filter cause a mini split to leak water?
Yes, severely dirty filters restrict airflow over the indoor coil. This causes the evaporator coil to drop below freezing, turning normal condensation into a solid block of ice. When the system eventually turns off or enters a defrost cycle, that ice melts rapidly and overwhelms the capacity of the drain pan, resulting in a sudden rush of water down your wall.
How much water should a mini-split drain outside?
During humid weather, it is normal to see a steady drip or small puddle near the outdoor drain pipe. The exact volume depends on the ambient humidity and how hard the system is working. However, if the outdoor pipe is completely dry while the AC is running continuously, the line is likely clogged, and an indoor leak may be imminent.
Should I turn off my mini split if it's leaking?
Yes, shut off the power immediately using the remote and the breaker. Stopping the system halts the production of condensation, which prevents further water damage to your home's interior. Once the power is secured, call a licensed technician from a trusted local provider like Greenhead Heating & Electrical to safely clear the blockage and inspect the internal components for water damage.
Protect Your Walls and Your Comfort This Season
A dripping ductless unit is a highly solvable issue once the equipment is safely powered down. Understanding the warning signs—from reduced airflow to a dry outdoor drain pipe—can help you catch a clog before it causes extensive drywall damage. As you transition into the fall heating-startup, do not let an unaddressed summer clog compromise your comfort. Rely on the seasoned professionals at Greenhead Heating & Electrical LLC to clear the lines safely, restore your system's efficiency, and keep your home protected before winter arrives.